Session 16: Markdown: Write notes that look like the web
You might know HTML from the internet: <h1>, <p>, <a>. But for notes and documentation HTML is far too much typing. That’s what Markdown is for.
Markdown is a mini-language you write in plain text. It looks readable without having to convert it first. And with one push of a button it becomes neat HTML: headings, lists, links, tables.
In this session you learn the whole basis of Markdown. At the end you write notes that look professional, on GitHub, in Obsidian, or in any other program that understands Markdown.
What you’ll learn today
- Making headings and paragraphs
- Formatting text: bold, italic, strikethrough
- Lists and bullet points
- Links to other pages and websites
- Adding images
- Making tables
- Horizontal lines and code blocks
Why Markdown?
Markdown is everywhere:
- GitHub: every repo has a
README.mdin Markdown. Issues, pull requests, wikis: all Markdown. - Obsidian, Joplin, Logseq: note-taking apps that save your documents as
.mdfiles. - Discord, Slack, Reddit: support Markdown for quick formatting in messages.
- Hugo (this website!): all the session pages you see here are written in Markdown.
- Jupyter Notebooks: the text cells are Markdown.
The big advantage: you write plain text. No complicated tags. And the result is always readable, even as plain text.
Step 0: Creating a Markdown file
Markdown files end in .md. Make one:
mkdir mijn-notities
cd mijn-notities
echo "# My First Note" > test.md
You can open .md files in any text editor: Notepad, VS Code, Thonny, Obsidian. VS Code has a built-in preview: click the icon with the magnifying glass and the book at the top right.
Step 1: Headings and paragraphs
You make headings with #. The more #, the smaller the heading:
# This is a title (h1)

## This is a subtitle (h2)

### This is a smaller heading (h3)

#### Even smaller (h4)
You make a paragraph by just typing text. A blank line between them starts a new paragraph:
This is the first paragraph. It just runs on.

This is the second paragraph. Because there's a blank line in between.
Tip: you use one # only once per document: for the title. The rest starts at ##.
Step 2: Formatting text
**This is bold**

*This is italic*

~~This is strikethrough~~

You can also **combine *bold and italic*** in the same sentence.
The result:
**bold**becomes bold*italic*becomes italic~~strikethrough~~becomesstrikethrough
Note: no spaces between the asterisks and the text. ** bold ** doesn’t work. **bold** does.
Some editors also accept underscores: __bold__ and _italic_. But asterisks are the standard: use those.
Step 3: Horizontal lines
You make a horizontal line with three (or more) dashes:
---Or with asterisks:
***The result is a line across the full width. Use it sparingly: one or two per document is enough. Too many lines make your notes messy.
Step 4: Lists
Unnumbered list
Use -, * or +:
- Python
- Git
- Markdown
- GitHub
You can nest lists by indenting (2 or 4 spaces):
- Programming languages
  - Python
  - JavaScript
- Version control
  - Git
  - GitHub
Numbered list
1. Open Thonny
2. Write your code
3. Click Run
It doesn’t matter which numbers you type: Markdown numbers automatically. This:
1. Step one
1. Step two
1. Step three
…gives exactly the same result as 1, 2, 3. Handy if you want to add a step later without renumbering everything.
Checklist (GitHub style)
- [x] Install Git
- [x] Make your first commit
- [ ] Learn branches
- [ ] Open a pull request
[x] is ticked, [ ] is open. Works in GitHub issues, pull requests, and many note-taking apps.
Step 5: Links
External links (to websites)
[click here for the CoderDojo site](https://python.coderdojohasselt.be)The word between [ ] is the clickable text. The URL between ( ) is the destination.
Internal links (to other pages in your project)
[View session 11](11-git-intro/)This links to the file 11-git-intro/_index.md in the same folder.
Quick link (show the URL directly)
<https://github.com>This shows the URL as a clickable link, without separate text.
Step 6: Images
An image is almost the same as a link, but with a ! in front:
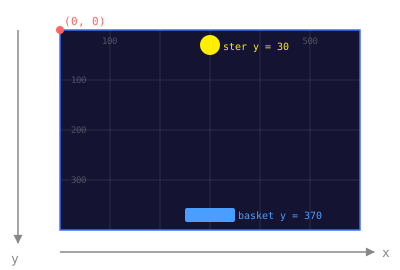The text between [ ] is the alt text: it appears if the image doesn’t load, or is read out by screen readers.
Images and Git: Small images (SVG, small PNGs) you can put in Git. Big images (>1 MB) and videos better not, because they make your repo slow.
Step 7: Tables
| Command | What it does |
|----------|-------------|
| `git init` | Create a new repository |
| `git add` | Get files ready for a commit |
| `git commit` | Record changes |
| `git push` | Send commits to GitHub |
The | characters form the columns. The --- line separates the header from the data. The : in the separator line determines the alignment:
| Left aligned | Centred | Right aligned |
|:-----------------|:-----------:|------------------:|
| left              | middle      | right             |
Step 8: Code and code blocks
Inline code
Use backticks for short pieces of code in a sentence:
Use `git status` to see what has changed.Code blocks
For several lines of code you use three backticks:
```python
def groet(naam):
    return f"Hallo {naam}!"
```
The language (python) after the first backticks gives syntax highlighting. This works for dozens of languages: bash, html, css, javascript, json, yaml, markdown.
Code block without a language
```
This is just text
without syntax highlighting
```
Step 9: Blockquotes
Use > for quotes or important remarks:
> Git is not a backup. Git is a time machine.
> Someone on the internet
Several > lines one after another form one block. An empty > line starts a new paragraph inside the quote.
Step 10: Everything together: a real README
A good README.md combines everything you know now. Here’s an example:
# My Project

A short description of what this project does.

## Installation

```bash
git clone https://github.com/jouw-naam/mijn-project.git
cd mijn-project
```

## Usage

1. Open `main.py` in Thonny.
2. Click **Run**.
3. Choose a level and start.

## What you'll learn

- [x] Pygame Zero basics
- [x] Collision detection
- [ ] Highscore system
- [ ] Sound effects

## Links

- [CoderDojo Hasselt](https://coderdojohasselt.be)
- [Source code on GitHub](https://github.com/jouw-naam/mijn-project)
Cheatsheet
| What | Markdown |
|---|---|
| Heading level 1 | # Title |
| Heading level 2 | ## Subtitle |
| Heading level 3 | ### Smaller heading |
| Bold | **bold** |
| Italic | *italic* |
| Strikethrough | ~~strikethrough~~ |
| Horizontal line | --- or *** |
| List (unordered) | - item |
| List (numbered) | 1. item |
| Checklist | - [ ] open item |
| Link | [text](url) |
| Image |  |
| Inline code | `code` |
| Code block | ```language |
| Quote | > quote |
| Table | | column | column | |
Showcase
Show a coach and a buddy:
- A Markdown document with at least one heading, a list, a link and bold text.
- A table with at least two columns and three rows.
- A checklist with ticked and open items.
See you next time!
Markdown is simple, but it’s everywhere. Your READMEs on GitHub, your notes in Obsidian, your documentation: everything becomes more readable with Markdown. Use it. Don’t overdo the formatting. Good notes are clear, not busy.
Take it home
- Easy: Write a
README.mdfor your favourite Python project. Use headings, a list and a code block. - Medium: Make a note in Obsidian (or another Markdown editor) about what you learned this month. Use all the formatting from the cheatsheet at least once.
- Hard: Build a “cheatsheet” page in Markdown for a topic of your choice (Git commands, Python syntax, maths formulas). Use tables and nested lists.
- Very hard: Make a Markdown document with a nested list that goes at least three levels deep, a table with alignment, and a code block with syntax highlighting.